Virtual Hosting
By default CL-HTTP will serve a single web site located at the host specified by:
http::*local-host-domain-name*
or, if specified, by:
http::*http-host-name*
Alternatively CL-HTTP provides a virtual hosting facility that allows you to host two or more independent web sites on the same server. The following example shows how to do this.
Setting up two web sites on a single server
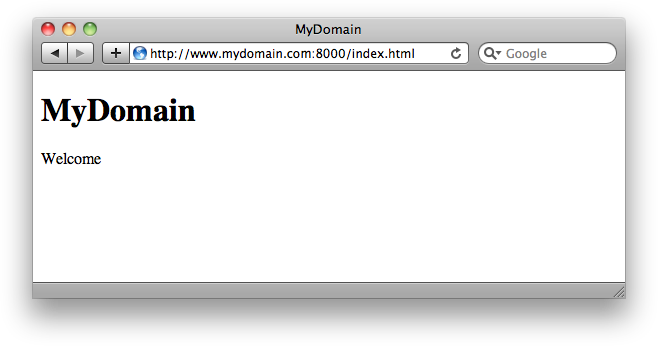
This example shows how to run two web sites on the domains
www.mydomain.com
and
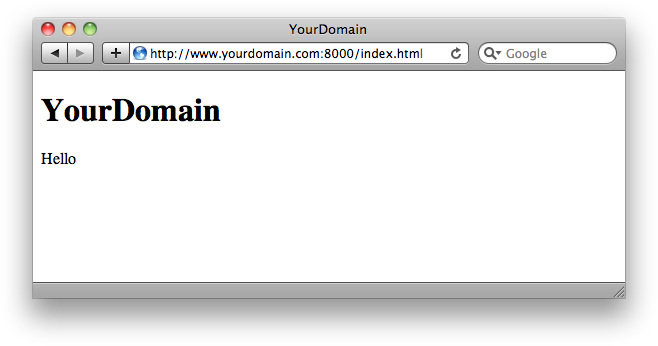
www.yourdomain.com
The first step is to define the two virtual hosts using the command:
(add-virtual-host domain-name &optional port protocol)
So the commands are:
(add-virtual-host "www.mydomain.com" 8000)
(add-virtual-host "www.yourdomain.com" 8000)
Then we define the two pages:
(defun mydomain (url stream)
  (with-page (url stream "MyDomain")
        (with-paragraph (:stream stream)
          (write-string "Welcome" stream))))

(export-url #u("/index.html" :host "www.mydomain.com" :port 8000)
            :computed
            :response-function 'mydomain)

(defun yourdomain (url stream)
  (with-page (url stream "YourDomain")
        (with-paragraph (:stream stream)
          (write-string "Hello" stream))))

(export-url #u("/index.html" :host "www.yourdomain.com" :port 8000)
            :computed
            :response-function 'yourdomain)
and:
Testing virtual hosts
Unless you have access to your own DNS server, testing sites using virtual hosting can be quite tricky. One way is to run a DNS server on your test computer, but fortunately on Mac OS X there is a simpler solution, using the local hosts file.
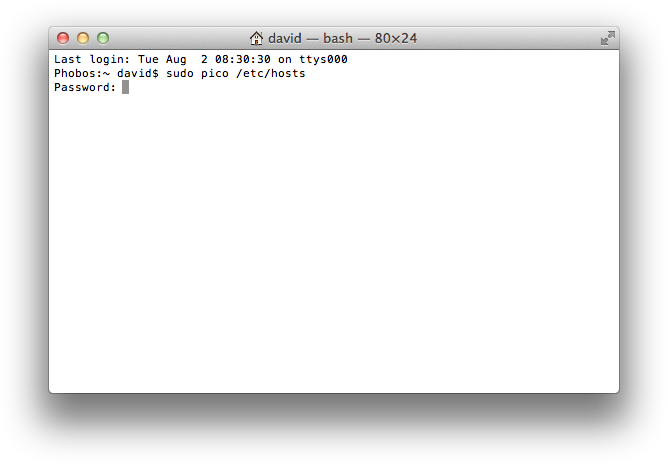
You need to edit the hosts file as root user, so open Terminal (in the Utilities folder in Applications), and enter:
sudo pico /etc/hosts
You will be prompted for the administrator password:
Enter the administrator password, and the default hosts file will be displayed in the Pico editor:
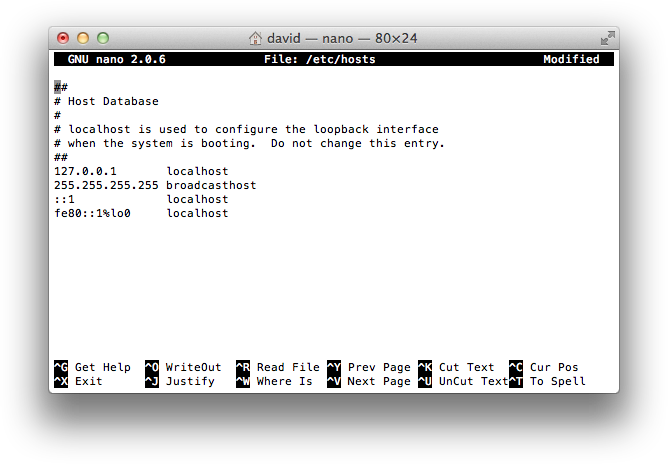
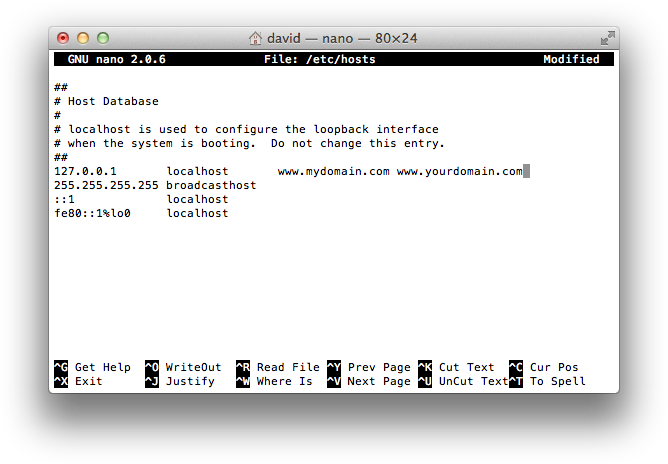
Use the cursor keys to move the cursor to the end of the line:
127.0.0.1 localhost
Then add the domain names you want to resolve to the local computer:
127.0.0.1 localhost www.mydomain.com www.yourdomain.com
Here's the edited file:
Then type Ctrl-O to save the changes and Ctrl-X to exit from Pico. Be careful not to make any other changes to the file or you may upset the operation of the network on your computer.
You will now be able to connect to the two virtual hosts on your computer.
Note that when you go live with the two sites on an external server, remember to remove the references from your hosts file or you won't be able to connect to them from your computer.
blog comments powered by Disqus